 We got blocked!

Requirements
Entry Level: 255+
Arcane Force/Power: 1320
Item Requirements: Fragment of Destiny
Entry/Clear Limit: One entry a day, one clear a month (shared between Hard and Extreme)
Boss Stats
Level: 265 (Knights), 275 (Black Mage)
Note that these HP values are rough estimates that I calculated using Battle Statistics after observing a player in TaiwanMS solo the boss, and may not be 100% accurate. See below for the explanation on the White HP Gauge.
Phase 1: 63,000,000,000,000 (63 trillion), +770,000,000,000 (770 billion) per White HP Gauge
Phase 2: 115,500,000,000,000 (115.5 trillion) +2,310,000,000,000 (2.31 trillion) per White HP Gauge
Phase 3: 157,500,000,000,000 (157.5 trillion) +3,770,000,000,000 (3.77 trillion) per White HP Gauge
Phase 4: 135,000,000,000,000 (135 trillion) +3,300,000,000,000 (3.3 trillion) per White HP Gauge
- Recently, HP values have been circulating around saying that the BM's HP is 65t HP in Phase 1, 135t HP in Phase 2, 200t in Phase 3, and 98t in Phase 4. These were taken from Battle Stats by a hacker in GlobalMS who soloed the BM (and got permanently banned not long after). I'm only bringing this up because the HP values are inflated, since it also took the White HP Gauge into account (covered later). I was able to find the HP of Phase 2 through a Battle Analysis, with details laid out here.
Time Limit: 1 hour (Hard mode), 30 minutes (Extreme mode)
Life Count: 12 (indicated by a gauge on the left of your screen)
All Phases
The battle consists of 4 phases. The Black Mage cannot be subjected to any type of bind (except for his knights in Phase 1), and will only take the damage from the binding skill without being frozen in place. As the final boss, the Black Mage will use various attacks and skills based off ones used by previous boss fights, such as Magnus, Verus Hilla, Damien, Lucid and Will. This will make the boss fight much more intense than any other boss fight in the game.
Curses
Throughout the battle, you will be inflicted with a curse when getting hit by various attacks. There are two kinds of curses:
Creative Curse:
and Destructive Curse:
The Creative Curse casts the following effects on the player for 6 seconds:
- 4% HP and MP recovery per second
- 10% Final Damage reduction
- Creates red flames that explode around the player, dealing 15% HP damage per second.
The Destructive Curse casts the following effects on the player for 6 seconds:
If you are inflicted with one curse and then receive the other curse within 6 seconds, you will lose 1 Life Count, take an additional 50% HP damage, and your skills will be sealed for 5 seconds.
- 15% increase in damage taken (including %HP attacks)
- 10% Final Damage increase
- Potions/consumables will be blocked
White HP Gauge
When specific patterns are activated, a shield is created for the boss and a white health gauge is added. Players need to deplete it as fast as they can to continue damaging the boss.
Phase 1
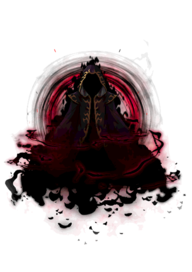
The 1st phase will take place in the Temple of Darkness. Here, the Black Mage will sit on his throne in the background and call his Knights of Light and Darkness:
Aeonian Rise:
and Tanadian Ruin:
The two knights will share an HP bar, as well as damage taken, meaning that damaging one will automatically hurt the other, and the two will die at the exact same time.
Each knight will have identical attack patterns, but will cast a different curse on you. Getting hit by the Aeonian Rise will inflict the Creative Curse, while the Tanadian Ruin will inflict the Destructive Curse. Since you will deal with both bosses at once, you will have to be cautious when getting hit.
Chain Swing
Either of the knights will swing its chain to attack you, dealing 15% HP damage with knockback.
Rush
Either of the knights will lift its sword and charge towards the player, dealing 25% HP damage.
Dive Attack
Either of the knights will teleport into the ground and reappear in midair, diving vertically towards the ground. There are 2 versions of this skill: either the knight will teleport straight up in the air, or it will teleport to the other knight's position. If one of the knights drops onto you, you will take 100% HP damage.
Red Lightning
Every 20 seconds, two red lightning barriers will trap player(s) inside, making the player(s) more vulnerable to attacks. The only chance of escaping is to wait 15 seconds (or teleporting out if possible), otherwise trying to break free will result in colliding into one of the barriers, dealing 99% HP damage (1 hit KO if inflicted with the Destructive Curse).
Shrieking Wall
As the battle goes on, walls will continuously appear on the corners of the map. These walls will block the player, as well as the two knights, from moving, and will gradually shrink the size of the battlefield. This will make the battlefield more deadly when trying to avoid getting hit by both knights at once. Getting hit by one of these walls as it appears will deal 1000% HP damage, so avoid staying at the corners of the map for too long. When a wall appears, the two knights will be given a White HP Gauge.
Black Chains
This attack pattern is similar to Lucid's lasers, where chains will fall diagonally onto the players' locations after a short warning period, dealing 15% HP damage. Similar to the lasers, each player will be affected by their own chains, and the chains will target players. The chains will have a much shorter period in between each chain, and typically you will have to deal with 3 OR 6 chains at a time. If you deal with 6 chains at once, they will inflict the Destructive Curse upon getting hit, but will not inflict any curse if you deal with 3 chains at once.
Barbed Meteors
A row of purple/red meteors with a white coating will fall vertically from the sky every 60 seconds. Each meteor deals 50% HP damage and inflicts the Creative Curse.
Once the two knights have been defeated, they will melt, and the next phase will begin.
Phase 2
In this phase, the Black Mage will fight you himself on the Throne of Darkness. He will deal 3% HP damage as touch damage.
Barbed Meteors
Same as Phase 1.
Purple Meteors
A row of purple meteors will fall diagonally from the sky. Each meteor deals 10% HP damage. However, if they fall on the floor, they will move either left or right, to the end of the map, dealing 15% HP damage to anyone in the way.
Getting hit in either case will inflict the Creative Curse.
Black Chains
Same as Phase 1, but up to 13 chains can appear at a time.
Blindness
Reduces your vision for up to 6 seconds.
Flaming Spikes
The Black Mage will summon several large, flaming groups of spikes that covers a large area in the floor, and raise them towards unlucky players who get caught by them after a short warning period, inflicting the Creative Curse. Deals 90% HP damage in Hard mode and 100% HP damage in Extreme mode.
Piercing Gaze
The Black Mage summons two large eye-shaped orbs, with one bouncing around the map randomly and the other following players. They will deal 5% HP damage every 0.3 seconds upon coming into contact with them, inflicting the Destructive Curse, and will explode and disappear after a short time.
Lightning Columns
Every 70 seconds, the Black Mage will charge an attack with one (or both) of his hands, then he will unleash a full-map attack with laser walls covering the whole map. Any player caught by the lasers will take 1000% HP damage, so the players needs to find a safe spot while he uses the attack. Regardless of which color uses, the Black Mage will gain a White HP Gauge once the attack pattern ends worth 2.31 trillion HP, lasting up to 25 seconds (after which it will disappear). The lasers' color and directions depend on which hand he used to charge the attack:
If he uses his right hand (left side of the screen), red lasers will appear, and the safe spot is the left corner of the map.
If he uses his left hand (right side of the screen), purple lasers will appear, and the safe spot is the left corner of the map.
If he uses both hands, red and purple lasers will appear, and the safe spot is the very middle of the map, right under the Black Mage.
This location can be tricky with his touch damage, as it can potentially push you outside of the safe spot.
Phase 3
After the Black Mage's physical form has been defeated, he will pull you into his inner universe, where he has transformed into a god, and is now a being made of pure light. The battle will now take place at The In-Between, a space-themed battlefield.
In this phase, Orchid will appear periodically to help out by dealing a certain amount of damage (between 3 billion and 10 billion damage per attack) to the Black Mage.
Barbed Meteors
Same as Phase 1 and 2.
Purple Meteors
Same as Phase 2.
Red Meteors
These meteors will slowly ascend from the floor, exploding upon contact with a player, dealing a small amount of % HP damage and reversing controls.
Blue Meteors
These meteors will slowly descend from the ceiling, exploding upon contact with a player, dealing a small amount of % HP damage.
Shield/Protective Zone
The Black Mage will surround himself with a large disco ball-shaped shield that works similar to Magnus's Blue Zone. The shield's size will decrease as the battle progresses. When outside the shield, your damage and potion recovery will be reduced by half, but will be normal when inside the shield.
Push
The Black Mage can push players away from himself at close range, which deals 30% HP damage and results in super knockback, while also inflicting the Creative Curse.
Pull
The Black Mage can pull players toward himself, with no additional damage or effects.
Lasers
Lasers will appear in various directions, inflicting the Destructive Curse. This, coupled with the Push and Pull attacks, can cost many lives if you aren't careful. These lasers appear in 2 variants:
1. Blue lasers that will appear in one set normally and deal 20% HP damage:
2. Pink lasers that appear in a set of 3 when the Black Mage casts a special animation, dealing 50% HP damage:
Kamael
The Black Mage will summon Kamael, an Angel of Destruction (with the appearance of a small blue being of light). It stays in place high in the air without moving and cannot be attacked, but it can fire light blue projectiles at you that deal 10% HP damage and inflict the Destructive Curse.
Power of Creation and Destruction
The Black Mage's ultimate attack pattern in this phase. Right at the beginning of this phase, several blue explosions will occur in random spots in midair, creating platforms at those spots.
Note that getting hit by these explosions, whether it is creating or destroying the platform, will deal 20% HP damage and inflict the Creative Curse).
He can use either the power of Creation or Destruction as an ultimate attack. The two attack patterns are as follows (platforms indicated with a red box):
Creation
The Black Mage will flash with a white aura, dropping a lot of large white meteors that deal 1000% HP damage. The meteors are very close to each other, but they can be narrowly avoided if you stand underneath one of the platforms above.
Destruction
The Black Mage will flash with a multicolor aura, breaking the floor and creating a large vortex that sucks players towards it, dealing 1000% HP damage to any players not standing on one of the platforms above.
Note that he can still use his Push attack, so be careful of getting knocked off the platform.
Regardless of which he uses, the platforms will disappear at the end of the attack pattern and the Black Mage will gain a White HP Gauge once the attack pattern ends.
Phase 4
You will now fight the Black Mage Beyond Existence, an area that is entirely black and white. The Black Mage has turned into a black and white version of his Phase 3 form. To fit with the theme of the area, all of his attacks will be white and black (representing light and dark). In this map, you will not be able to see your party members, but you can still receive buffs from them if they are in range.
Wielding Creation and Destruction
You will receive a special skill during this phase that lets you wield the power of Creation OR Destruction, rendering you immune to white or black attacks, respectively (i.e. wielding Creation will cause you to take damage from dark attacks and be unaffected by white attacks, and vice versa when wielding Destruction). You can swap between the two with the NPC Chat key.
The white versions of his attacks inflict the Creative Curse (with black and white flames instead of red)
while the black versions of his attacks will inflict the Destructive Curse, so be careful when swapping between the two.
Slow
The Black Mage will cast a Slow debuff on you that works similar to Magnus's Slow/Web debuff, preventing players from using movement skills.
Bullets
The Black Mage can fire a volley of white and black bullets in either circle-shaped formation or in a direct linear stream. Each bullet does 10% HP damage, and they come in a very dense formation.
Explosions
White and black explosions will erupt around your character, dealing 50% HP damage.
Light/Dark Pillars
The Black Mage covers the floor with white and black pillars on the ceiling:
and the floor;![[IMG]](https://i.imgur.com/rkEc4vX.gif)
dealing 1000% HP damage. As with the other attacks, you will not take damage from the color of the pillar based the power you currently wield. After this attack ends, the Black Mage will gain a White HP Gauge.![[IMG]](https://i.imgur.com/eOJ6Y2J.gif)
Rewards
In Hard and Extreme mode, defeating this form will cause the Genesis Crux to appear. Players need to attack it to receive the rewards. It can only be hit with Basic (Normal) attacks.
It will drop 30 Bonus Occult Cubes, as well as an Intense Power Crystal worth 500,000,000 mesos (split between your entire party).
At a low chance, it can also drop the Genesis Badge
This Badge is part of the Pitched Boss Set.
- Req Level: 200
- STR: +15
- DEX: +15
- INT: +15
- LUK: +15
- Weapon Attack: +10
- Magic Attack: +10
- Speed: +10
- Jump: +1
- 0 Slots (Cannot gain potential)
Genesis Weapon
Once you defeat the Black Mage in Hard mode once, you will obtained a sealed Genesis Weapon, that can be unsealed by completing a series of quests that involve defeating the Black Mage and his commanders multiple times. The quests are as follows:
Traces of Von Leon the Lion King
The first quest requires defeating Hard mode Von Leon, with the following restrictions:
Traces of Arkarium, the Guardian of Time
- Must be defeated alone
- Only your sealed Genesis Weapon (except for Zero, who will use Lapis/Lazuli), secondary weapon, and Arcane Symbols must be equipped
- Only base stats will apply to your equipment
- 90% Final Damage reduction
The second quest requires defeating Normal mode Arkarium, with the following restrictions:
You must also defeat the Black Mage in Hard mode again for a Black Mage Remnant, an etc drop required in order to complete the quest. Keep in mind that he can only be cleared once a month.
- Must be defeated alone
- Only your sealed Genesis Weapon (except for Zero, who will use Lapis/Lazuli), secondary weapon, and Arcane Symbols must be equipped
- Only base stats will apply to your equipment
- 75% Final Damage reduction
Traces of the Tyrant Magnus
The third quest requires defeating Hard mode Magnus, with the following restrictions:
You must also defeat the Black Mage in Hard mode again for a new Black Mage Remnant.
- Must be defeated alone
- Only your sealed Genesis Weapon (except for Zero, who will use Lapis/Lazuli), secondary weapon, and Arcane Symbols must be equipped
- Only base stats will apply to your equipment
- 50% Final Damage reduction
Traces of Lotus, the Wing Master
The fourth quest requires defeating Hard mode Lotus, with the following restrictions:
You must also defeat the Black Mage in Hard mode again for a new Black Mage Remnant. Note that you do NOT have to wear the Genesis Weapon or remove all your gear.
- Must be defeated alone
- 20% Final Damage reduction
Power Unbound, Stage 1
After Hard Lotus is defeated, the weapon will be unsealed. However, it will only receive the Tanadian Ruin skill, which activates while you are attacking to give a 15% Final Damage buff for 30 seconds, with a 120 second cooldown.
Traces of Damien, the Sword of Destruction
The fifth quest requires defeating Hard mode Damien, with the following restrictions:
You must also defeat Hard mode Black Mage again for a new Black Mage Remnant.
- Must be defeated alone
- Number of lives reduced from 10 to 5
Traces of Will, the King of Spiders
The sixth quest requires defeating Hard mode Will, with the following restrictions:
You must also defeat the Black Mage in Hard mode again for a new Black Mage Remnant.
- Must be defeated alone or with 1 other person
- If fighting with 1 other person, both players must be on the same exact quest, and both will receive a -50% Final Damage reduction
- Damage taken increased by 10% (includes % HP attacks)
Traces of Lucid, Keeper of Nightmares
The seventh quest requires defeating Hard mode Lucid, with the following restrictions:
- Must be defeated alone or with 1 other person
- If fighting with 1 other person, both players must be on the same exact quest, and both will receive a -50% Final Damage reduction
- You may only use 50 Consumable / Usable Items
You must also defeat the Black Mage in Hard mode again for a new Black Mage Remnant.
Traces of Verus Hilla the Red Witch
The eighth and final quest requires defeating Verus Hilla, with the following restrictions:
You must also defeat the Black Mage in Hard mode again for one last Black Mage Remnant.
- Must be defeated alone or with 1 other person
Note that you will skip Phase 1 of the Verus Hilla boss battle and go straight to Phase 2 (meaning her HP is reduced by 25%).
- If fighting with 1 other person, both players must be on the same exact quest, and both will receive a -50% Final Damage reduction
Power Unbound, Stage 2
After Verus Hilla is defeated, the weapon will be fully liberated. It will receive the following benefits:
- Complete scrolling with Spell Trace 15% Weapon Enhancements (cannot be changed)
- 22 Star Force Enhancements (cannot be changed)
- Unique Potential (if not Unique already, can be changed/cubed over)
- Epic Bonus Potential (if not Epic already, can be changed/cubed over)
- Unlocked Aeonian Rise skill, which grants a 10 second invincibility buff, after which it casts the Genesis Force skill, which explodes to attack up to 12 enemies for 1500% damage 7 times (can also be activated immediately by using the skill again)
Credits/Links
Namu/Tree Wiki for information on the Black Mage's attacks
https://namu.wiki/w/검은 마법사/보스 몬스터
Strudels_PB for help with formatting.
iSlingGunz (Kobe) for certain screenshots
Genesis Weapon Playlist:
創世任務 - YouTube
Black Mage Boss Guide (and Genesis Weapons)
Guide in 'Bossing Guides' published by PirateIzzy, Nov 24, 2024.
A guide on how to not lose all your lives without actually dying (as well as liberating the Genesis Weapon).
-
-
Guide Author PirateIzzy, Find all guides by PirateIzzy
-
-
Boss Mechanics
-
Gameplay
Bossing -
Guide Version
1Game Version
209Changelog
1.1.2: Clarified that Verus Hilla requires another Black Mage Remnant.
1.1.3: Clarified the use of hands in Phase 2.
1.1.4: Added Spoiler tags for the GIFs.
1.2.1: Updated Will and Verus Hilla
1.2.2: Included Phase 2's HP values and added Intense Power Crystal meso value. - Loading...
![[IMG]](https://vignette.wikia.nocookie.net/maplestory/images/2/2e/UI_Black_Mage_Life_Gauge.png/revision/latest?cb=20181231090954)
![[IMG]](https://i.imgur.com/opa7Fux.gif)
![[IMG]](https://i.imgur.com/Q0WqLPQ.gif)
![[IMG]](https://i.imgur.com/ExX7Y1X.gif)
![[IMG]](https://i.imgur.com/VSFryzT.png)
![[IMG]](https://vignette.wikia.nocookie.net/maplestory/images/5/56/Mob_Aeonian_Rise.png)
![[IMG]](https://vignette.wikia.nocookie.net/maplestory/images/c/c6/Mob_Tanadian_Ruin.png/revision/latest)
![[IMG]](https://i.imgur.com/wNb42L0.gif)
![[IMG]](https://i.imgur.com/c78GSgj.gif)
![[IMG]](https://i.imgur.com/XA5GaeZ.gif)
![[IMG]](https://i.imgur.com/VANFFm8.gif)
![[IMG]](https://i.imgur.com/P5zTUoT.gif)
![[IMG]](https://i.imgur.com/TvXrimk.gif)
![[IMG]](https://i.imgur.com/QeuGQXo.gif)
![[IMG]](https://i.imgur.com/IRbeaF7.gif)
![[IMG]](https://i.imgur.com/c3ZggDa.gif)
![[IMG]](https://i.imgur.com/zcyFA8F.gif)
![[IMG]](https://vignette.wikia.nocookie.net/maplestory/images/4/47/Mob_Black_Mage.png/revision/latest)
![[IMG]](https://i.imgur.com/Gw0KgYQ.gif)
![[IMG]](https://i.imgur.com/7CT6Fdv.gif)
![[IMG]](https://i.imgur.com/nffAuHa.gif)
![[IMG]](https://i.imgur.com/xrzSFlq.gif)
![[IMG]](https://i.imgur.com/cWbLV8H.gif)
![[IMG]](https://i.imgur.com/lb3scFx.gif)
![[IMG]](https://i.imgur.com/dyIAfmC.gif)
![[IMG]](https://i.imgur.com/fMVlj7b.gif)
![[IMG]](https://i.imgur.com/EFk3wMu.gif)
![[IMG]](https://i.imgur.com/5ysYBRn.gif)
![[IMG]](https://i.imgur.com/Gz1SEbB.gif)
![[IMG]](https://i.imgur.com/SJd6Pyv.gif)
![[IMG]](https://i.imgur.com/1HWKTvc.gif)
![[IMG]](https://vignette.wikia.nocookie.net/maplestory/images/3/31/Mob_Black_Mage_(2).png/revision/latest)
![[IMG]](https://i.imgur.com/k6x1vgm.png)
![[IMG]](https://i.imgur.com/5JlMr0s.png)
![[IMG]](https://i.imgur.com/gPrrsMK.png)
![[IMG]](https://i.imgur.com/WjDnXvJ.gif)
![[IMG]](https://i.imgur.com/q081GSb.gif)
![[IMG]](https://i.imgur.com/3Ia7W4j.gif)
![[IMG]](https://i.imgur.com/nghc9bw.gif)
![[IMG]](https://i.imgur.com/LJ0seBp.gif)
![[IMG]](https://vignette.wikia.nocookie.net/maplestory/images/c/c2/Mob_Kamael.png/revision/latest)
![[IMG]](https://i.imgur.com/fmFuNiq.gif)
![[IMG]](https://i.imgur.com/Q0pEcRu.gif)
![[IMG]](https://i.imgur.com/7EdfqJh.png)
![[IMG]](https://cdn.discordapp.com/attachments/330191359829082114/531253390148239362/Phase_3_Creation.png)
![[IMG]](https://i.imgur.com/VgsZPhi.gif)
![[IMG]](https://i.imgur.com/HpvPgda.gif)
![[IMG]](https://cdn.discordapp.com/attachments/330191359829082114/531253399270850571/Phase_3_Destruction.png)
![[IMG]](https://vignette.wikia.nocookie.net/maplestory/images/7/7b/Mob_Black_Mage_(3).png/revision/latest)
![[IMG]](https://i.imgur.com/f0YLWnU.gif)
![[IMG]](https://i.imgur.com/eyVetuG.gif)
![[IMG]](https://i.imgur.com/Ew8M7xB.gif)
![[IMG]](https://i.imgur.com/SFrlg5s.gif)
![[IMG]](https://i.imgur.com/SmyqIRT.gif)
![[IMG]](https://i.imgur.com/BxUSV8K.gif)
![[IMG]](https://i.imgur.com/ppG0NAp.gif)
![[IMG]](https://i.imgur.com/pVbLhgr.gif)
![[IMG]](https://i.imgur.com/8scPryo.gif)
![[IMG]](https://vignette.wikia.nocookie.net/maplestory/images/b/b9/Mob_Genesis_Crux.png/revision/latest)
![[IMG]](https://i.imgur.com/UCQan1K.png)
![[IMG]](https://cdn.discordapp.com/attachments/312354082356592641/618123339080269838/2000047.png)