 We got blocked!
Getting Started
As everyone may know, Gollux is a boss that drops coins and equips vital for endgame in GMS, namely the Superior Set. A recent revamp has buffed the boss in all difficulties to be much harder than he used to be, most notably his HP. Also, you can only enter once a day now, so you're out of luck if you're looking to carry people or just simply practice the boss.
Boss Difficulty
Gollux is unique in that you are required to kill body parts to change the difficulty. Destroying more lowers the difficulty and rewards given.

Only killing the shoulder and chest will actually affect the difficulty, so keep that in mind. Here are the difficulty levels along what they drop. Obviously doing the harder difficulties will give out more coins/pennies as well.
Easy Gollux: Kill all 3 body parts, drops pennies and Cracked equipment.
Normal Gollux: Kill 2 body parts, drops pennies with Cracked and Solid equipment.
Hard Gollux (or Hardlux): Kill only 1 body part, drops pennies, coins, in addition to Reinforced equipment with the aforementioned drops. Unlike Easy and Normal, this will only drop belts and earrings.
Hell Gollux (or Hellux): Kill no body parts, drops pennies, coins, in addition to Superior equipment with the aforementioned drops. Unlike Easy and Normal, this will only drop belts and earrings.
Boss Mechanics
Phase 1
Right off the bat, you will notice these little potatoes spawn on the left and right side and slowly move towards the center.

If they manage to reach the center, you will get one stack to a counter above your head. Simply having this on doesn't really have any negative effects other than not letting you leave the room, but you will die if the counter reaches 5 stacks. Other than that, these little guys are harmless and go down very fast, so just keep an eye on them.
Gollux has three attacks in Phase 1 and they're all pretty easy to dodge. See below:
Hand Attack, deals 100% HP damage. The attack will actually register when you see a puff of smoke as pictured here, so you still got time to dodge if you find that the hand is on you.

Purple Breath Attack, deals a small portion of health and also stuns. Sometimes Gollux will simultaneously use this along with his hand attack.

Pink Breath Attack, On contact, drags you towards the center to receive 100% HP damage. The most dangerous attack in Phase 1. If you are really struggling with dodging this, kill the chest's gem before facing Gollux's head.

Phase 2
Once you beat up Gollux enough, platforms will pop up. Using the portal in the center of the map will teleport you on a platform. This is where things start to get a little more difficult. This time Gollux has 5 attacks to choose from. Pay attention to his eyes, they'll help a lot with dodging the next attack.
Reversal: This is marked by orange eyes blinking for a brief amount of time. If this lands and you are in range, you will have reverse controls and receive about 90% HP damage and get stunned once it ends. It's the most annoying attack and Gollux also likes to use it the moment Phase 2 starts. Hero's Will can block this, so make sure to use it at the start of the phase. As for dodging it, I'll explain avoiding every attack in more detail below.

Hand attack: This is also marked by orange eyes blinking for a brief amount of time, with his hand rising up. You cannot duck under the hand anymore, so the only way to avoid this OHKO attack is to get off the platform. Teleporting, using the portal, or jumping down to the floor will avoid the attack (from easiest to hardest in terms of difficulty dodging). He will also use this on the floor as if it were Phase 1, so the same rules apply there.

One-Shot Explosion: Gollux gets blue eyes and charges electricity into them, then deals 100% HP damage through an explosion shortly after.

Bottom Platform Bombing: Gollux gets blue eyes and charges electricity into them, with the bottom platforms having warning markers on them. The floor will get bombed and deal a large portion of your HP during this attack. Very easy to avoid if you are on the floor for some reason, as they don't outright kill you and take time to detonate.

Weak Explosion: Gollux gets orange eyes and charges them. It hits the entire map and deals a small chunk of HP, negligible enough to just tank it whenever he uses it. Note that classes without 100% stance will be knocked back quite far with this attack, so bringing something like Mihile link isn't a terrible choice.

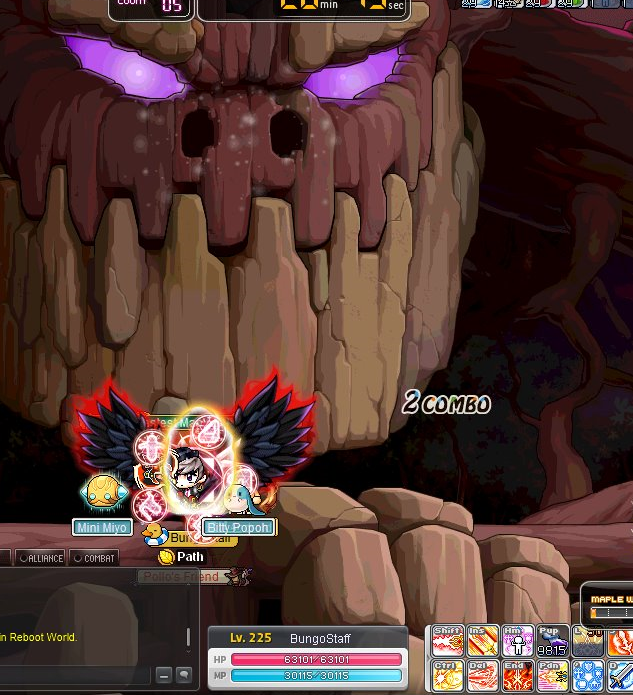
Phase 3
This is merely a damage check. Another platform will open up to his gem. Take the portal on the right side of the platforms used in Phase 2 and unload on that gem. All Gollux can do is spam a weak explosion at this point, so he's not too much of a threat. Just pay attention to the potatoes and your HP and the boss will go down in no time.
Boss Guide (Hellux)
Now that Gollux has been explained, fighting him is actually a lot simpler than it sounds. If you are ever confused about avoiding attacks in Hellux, you can always use this video as a reference:
Phase 1
You will notice a portal in the center. Take a look at this to get a feel at which side Gollux will be looking at you from, it'll be quite important for the rest of the phase. Do make sure not to hug the portal though, as the pink breath attack can still hit you.

This boss is basically a staring competition. When he is looking at you, get to the other side and out of his direction and proceed to keep attacking. This is as easy as using a rush skill when he looks at you.
Phase 2
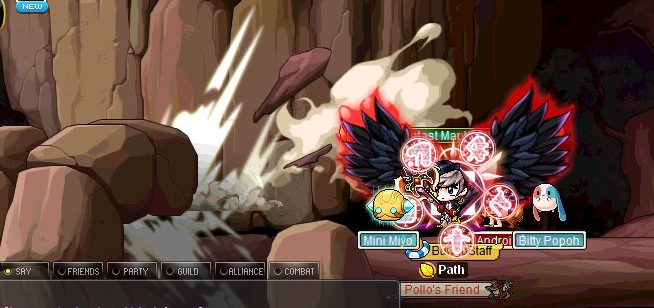
Once you manage to get on the upper platforms, make sure to get to outer edges of either of these portals pictured here.
This will make it so that you are out of range of the One-Shot Explosion and Reversal. This safe zone will make it so that the only attack you have to worry about is the Hand Attack. Again, you will have to get off the platform when you see this coming or you will die from it.
A good way to avoid the Hand Attack is to pause after Gollux finishes an attack. Pay attention to his eyes and prepare to the dodge the hand in case his eyes blink and the hand pops up.
Get 100% stance if possible, as the Weak Explosion he uses will knock you off the platform otherwise and leave you vulnerable to either Bottom Platform Bombings or Hand Attacks.
Phase 3
I don't really need to explain this but just use burst damage skills on his forehead and you win.
How to Hardlux the EZ way
This may apply to lower difficulties as well, but killing one body part will make the fight insanely easy. See this?

Once you get rid of that shoulder and stand on the left platform (in the safe zone of course), no attack besides the Weak Explosion will hit you. You can pretty much just focus solely on potatoes and damage by doing this. I see people destroy the chest all the time for an easier Phase 1, and while that does help, killing his left shoulder is a better option for taking on Hardlux imo.
Misc.
If something is missing or wrong leave a comment and I'll update the guide. Also in case anyone is curious I took the cover from here - [Boss Battle] Gollux *Huge Maplestory Boss* - Maps - Mapping and Modding: Java Edition - Minecraft Forum - Minecraft Forum
I would recommend an IED of about 85%+ before facing either Hardlux or Hellux. They recently increased the amount of PDR he has with the revamp.[/SPOILER][/SPOILER]

Gollux Guide (Updated)
Guide in 'Bossing Guides' published by bungo, Jul 13, 2020.
Although Gollux was revamped not too long ago, his mechanics are still mostly the same. This guide covers everything you need to know for Hellux or Hardlux runs.
-
-
Guide Author bungo, Find all guides by bungo
-
-
Guide Version
1.2Changelog
1.2: redone for gollux revamp
1.1: minor fixes and changes - Loading...